*Your blocks are meant to be opened and planted immediately for best results. Ready-to-fruit blocks will begin producing mushrooms 2-6 weeks after planting, but they can be refrigerated up to 2 months prior to opening.
Ready-to-fruit blocks can be buried outdoors in either early spring for a later spring fruiting, or late summer to early fall in wood chips or sawdust for a fall fruiting. This method works best with Black Pearl Oyster, Chestnut, Grey Dove Oyster, and King Oyster. Planting these blocks requires just a shaded, protected area in your yard and mulch to cover the blocks. Follow the five steps below for fruiting your mushroom blocks.
Fruiting Mushroom Blocks Outdoors
Building Your Ready-to-Fruit Mushroom Bed:
1) Select a Bed Location
Mushrooms prefer areas that are protected from the elements (primarily from the sun and wind). Find an area in your yard protected from the wind and well-shaded. Clear away any sticks from the area to allow for an even planting surface.
2) Building the Bed Foundation
Fully remove your mushroom blocks from the filter patch bag. Set your blocks down in a square formation with approximately one inch in-between each block (Figure 1). The space in-between the blocks will allow the mushrooms to grow from all sides of the block. We recommend using at least 4-blocks for this method at a time. If you purchase an 8-block set and would like to do this in two sets, keep unused blocks refrigerated until you are ready to plant a second set. Blocks will stay good refrigerated up to 4 months.
3) Mulching your Blocks
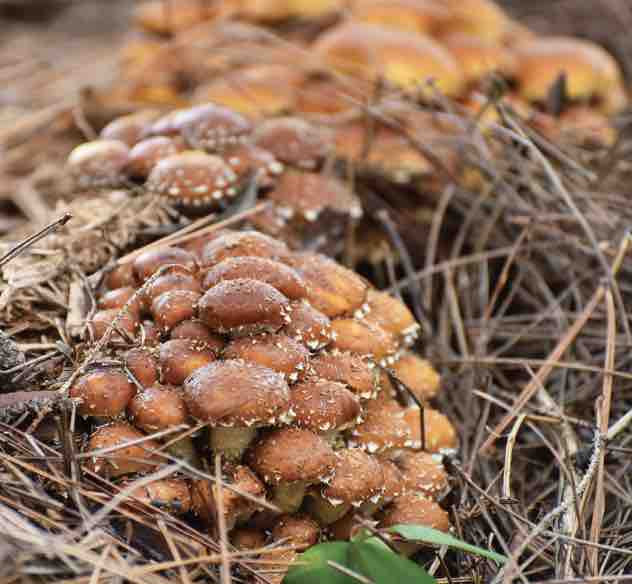
Mulch over and around your blocks with wood chips or sawdust (Figure 2). Other materials such as pine needles and leaves can be used as supplemental material, but woody material holds the moisture in more effectively. Aim for 3-5 inches of mulch on the edges of the bed and 1-2 inches on top to provide adequate coverage. Gravity will eventually get the better of your mulch, pulling it down and exposing the corners of your blocks. Simply scoop the mulch back up and onto your blocks to minimize bare spots.
4) Mushroom Harvest and Storage
Start to monitor your blocks after 2 weeks by simply walking past your bed. Oyster varieties take anywhere from 2-6 weeks and Chestnut take anywhere from 3-6 weeks to fully recover and develop. Outdoor production is often determined by seasonal temperature changes and each bed may take slightly shorter or longer depending on planting date.
Mushrooms need to be stored in the refrigerator until consumed or sold. A semi-breathable container such as a paper or cloth bag is ideal for reducing condensation and excessive wetness that will reduce the shelf life of your bounty.
5) Second and subsequent crops
After harvesting your first crop, re-mulch any exposed areas of the block. Depending on the time of initial planting you may see a second crop within another month, and possibly one in the following spring when the temperatures hover in the fruiting temperature range. When your blocks are done producing, let them sink into the forest floor or add them to your compost pile.


