*Your blocks are meant to be opened immediately for best results. Ready-to-fruit blocks will begin producing mushrooms quickly after arrival at room temperature, but they can be refrigerated up to 1 months prior to opening.
Table Top Farms are an incredible introduction into the world of fungi. They are available in many unique varieties (Shiitake, Oyster, Lion's Mane, King Oyster, Pioppini, Black Pearl, Reishi, and Chestnut). All are fun and easy to grow. The Pioppini, also called Pioppino, or the Black Poplar mushroom, starts its growth as tiny clusters of mini pins that explode into bouquets of long-stemmed mushrooms topped with dime to half dollar-sized caps. Use the entire mushroom when cooking and enjoy its crunchy texture and delicious flavor.
Setting up your Table Top Farm
1) Select a growing space
Choose a spot that is between 65-72°F with indirect natural or regular room lighting for about 8 hours or more a day.
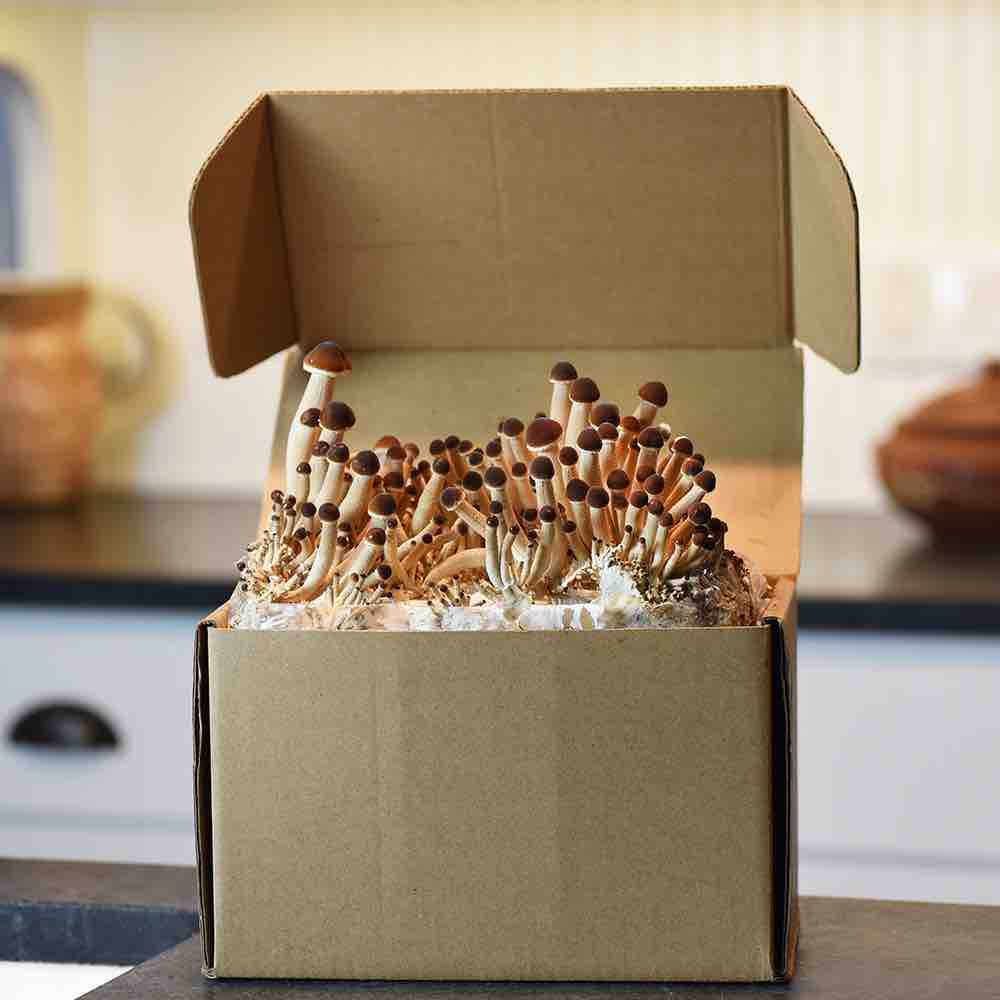
2) Setting up the Pioppini kit
Open the box containing your ready-to-fruit Pioppini block. The mushroom block will remain in its bag during the entire fruiting process. Simply stand the block upright and pull the top of the bag upwards. Air will travel through the filter patch and partially inflate the bag creating air space above the block where young mushrooms will begin to form (Figure 1). Do not open or cut into the bag as you might with other FFP kits!
3) Maintaining and monitoring
Tiny mushrooms will begin forming on the top surface of the block (Figure 2). They require high humidity to develop, and Pioppini "pins" are particularly susceptible to drying. Keep the bag sealed shut as the new pins develop (Figure 2). Once the majority of the pins reach 2-3 inches tall, carefully make a horizontal cut through the top of the plastic bag between the filter patch and the top seal. Use a scissors or knife to make a horizontal slit about 2 ½ inches long above the filter patch (about the same width of the filter patch). Allow the Table Top Farm to grow for several more days or until the mushrooms reach past the height of the filter patch. Now the slit can be extended across the entire width of the bag or the top can be cut off completely just under the bag's seal, allowing more room for the mushrooms to grow.
4) Pioppini Mushroom harvest and storage
Watch the mushrooms as they develop. They are ready to harvest when the bottom of the cap start to stretch away from the stem and the larger ones begin to flatten out (Figure 3). Reach down into the bag and gently grasp at the base of the clusters, twist and pull to harvest them from the block. Trim the bottom of the cluster to remove any sawdust.
Keep the mushrooms in a brown paper sack or a loosely folded plastic bag in your refrigerator's crisper drawer. Mushrooms will store for up to two weeks. Enjoy!
5) Second and subsequent crops
After harvesting, use tape, or fold over the top of the bag to mostly close it back up and trap humidity within. Pioppini will fruit a second time typically 12-21 days after the first flush.
Watch for pin development, and slowly open bag as they grow.


